Inspection of pipes encompasses a series of investigative procedures conducted on steel pipes to verify their structural soundness, adherence to safety measures, and alignment with applicable standards and specifications. This set of processes is vital across numerous sectors that depend on pipes for the conveyance of liquids, gases, or particulate matter, including the oil and gas, power generation, chemical production, and construction industries. Inspections may include metallurgical analysis to confirm material properties and mechanical performance, dimensional assessments to check pipe straightness, outer diameter (OD), inner diameter (ID), and wall thickness (WT), as well as evaluations of pressure endurance and verification of appropriate markings.
INSPECTIONS ON PIPES
WHAT MEANS INSPECTION?
In the field of pipes, and piping materials in general, inspection is defined as the systematic examination and assessment of piping systems to ensure that they meet specific criteria for quality, safety, and performance.

Inspecting pipes involves a variety of possible tests, checks, and examinations conducted on newly produced steel pipes to identify any defects, inconsistencies, or deviations from the prescribed standards (for example ASTM material grades, quality, and mechanical properties) and specifications (for example ASME B36.10M sizes and tolerances).
The goal of pipe inspection is to ascertain that the pipes are fit for their intended purpose, capable of safely handling their operational demands, and compliant with the regulatory requirements that govern their use in industrial applications.
WHY IS PIPE INSPECTION IMPORTANT?
A thorough inspection of newly produced pipes, before their deployment into piping systems or pipeline projects, is of the utmost importance for several reasons:
- Safety Assurance: Detects potential hazards that could lead to catastrophic failures, thereby protecting human lives, the environment, and property.
- Regulatory Compliance: Ensures that the piping systems meet all industry regulations and standards, which is necessary for legal operation and to avoid fines or shutdowns.
- System Reliability: Identifies issues before they become significant problems, reducing downtime and maintenance costs.
- Performance Verification: Confirms that the pipes can handle the expected flow rates and conditions they were designed for.
- Lifecycle Extension: Through regular inspection and maintenance, the service life of the piping system can be maximized.
TYPICAL INSPECTIONS BY ASME/API SPECIFICATIONS
Manufacturers conduct standard inspections on pipes by ASME (American Society of Mechanical Engineers) and API (American Petroleum Institute) specifications to ensure the quality, safety, and integrity of the pipes before they are shipped to customers.
Here are the typical inspections and tests conducted according to ASME and API standards:
Visual Inspection:
- Surface Defects: Checks for external and internal surface defects such as dents, scratches, laminations, and weld seam integrity.
- Alignment and Shape: Verifies the straightness, roundness, and overall shape of the pipe.
Dimensional Inspection:
- Diameter and Wall Thickness: Measures the outside diameter (OD), inside diameter (ID), and wall thickness to ensure they are within specified tolerances.
- Length Measurement: Confirms the length of the pipe to ensure it meets the ordered specification.
Non-Destructive Testing (NDT):
- Radiographic Testing (RT): Uses X-rays to detect internal flaws such as cracks or incomplete weld penetration.
- Ultrasonic Testing (UT): Employs high-frequency sound waves to identify defects beneath the pipe surface.
- Magnetic Particle Inspection (MPI): Detects surface and near-surface discontinuities in ferromagnetic materials.
- Dye Penetrant Inspection (DPI): Reveals surface-breaking flaws by using a liquid dye.
Mechanical Testing:
- Tensile Test: Assesses the material’s tensile strength and ductility.
- Charpy Impact Test: Measures the material’s toughness and ability to absorb energy during fracture.
- Hardness Test: Determines the resistance of the material to indentation and wear.
Metallurgical Testing:
- Microstructure Analysis: Examines the grain size and phase distribution of the metal.
- Chemical Analysis: Confirms the composition of the pipe material to ensure it matches the specified alloy.
Hydrostatic Testing:
Pressure Test: Ensures the pipe can withstand the design pressure without leaking.
Marking and Identification:
Product Marking: The pipe mill verifies that each pipe is correctly marked with the manufacturer’s name, grade, size, and heat number for traceability.
Documentation Review:
Certification: Ensures all pipes come with a Mill Test Certificate (MTC) or Mill Test Report (MTR) as per EN 10204, indicating all test results and compliance with the standards.
The combination of these inspections and tests according to ASME and API specifications forms a robust quality assurance program that manufacturers must adhere to. This systematic approach to testing and inspection is essential for delivering pipes that are reliable, safe, and fit for their intended purpose.
SCOPE OF INSPECTION
Manufacturers of pipes typically adopt a two-tiered approach when it comes to the inspection of their products: they perform certain inspections on every single pipe produced and others on a sample basis.
Full Inspection:
Every single pipe usually undergoes a series of non-destructive tests and visual inspections to ensure there are no surface imperfections, such as:
- Visual inspection for external defects.
- Dimensional checks for diameter, wall thickness, and length.
- Non-destructive testing (NDT) methods like Ultrasonic Testing (UT) for wall thickness verification and detection of internal flaws.
Sample Inspection:
For destructive tests or more involved analyses, a representative sample from a batch (or production run) will be tested to infer the properties of the entire batch. These may include:
- Tensile testing to determine mechanical strength.
- Charpy impact testing for toughness.
- Metallurgical testing like microstructure analysis.
- Chemical composition analysis.
The sampling rate for these tests is typically determined by the standards to which the pipes are being manufactured, such as those provided by the ASME or API, and can vary depending on the criticality of the application, the size of the production run, and the consistency of the manufacturing process.
It’s worth noting that for certain high-specification or critical-application pipes, more extensive testing may be required, and the frequency of sample testing may increase, or in some cases, every pipe may be tested. The sampling rate may be negotiated with the client.
In summary, while all pipes are subject to some level of inspection, the extent and frequency of testing per pipe versus per batch depend on the type of inspection, the applicable standards, the manufacturer’s quality control procedures, and the requirements of the end user.
ENGAGING THIRD-PARTY INSPECTION
A pipe manufacturer, or their client, may involve an independent third party (such as Lloyd’s, SGS, or Cotecna) for the inspection of pipes under several circumstances, reflecting the critical need for impartiality, expertise, and assurance of quality and compliance. This practice is common in industries where safety, reliability, and adherence to strict standards are paramount, such as oil and gas, power generation, chemical processing, and construction.
Here are key scenarios where third-party inspections are typically required or highly beneficial:
High-Stakes Applications
For projects where the failure of a piping system could have severe consequences, such as in the oil and gas industry, where leaks or failures could lead to environmental disasters or significant financial losses. Third-party inspections provide an additional layer of scrutiny and assurance.
Regulatory Requirements
Certain jurisdictions or industry standards may mandate third-party inspections to ensure compliance with local, national, or international safety and quality standards. This is often the case when pipes are used in critical applications, such as transporting hazardous materials.
Customer or Contract Specifications
A client or project manager might stipulate third-party inspections as part of the contract requirements to ensure that the materials supplied meet all specified standards and performance criteria. This is particularly common in large-scale infrastructure projects or when the end user operates in a highly regulated industry.
Certification and Accreditation
When pipes need to be certified by recognized standards organizations (such as ASME, API, or ASTM), manufacturers may engage third-party inspectors to verify that their products meet the specific criteria set forth by these entities. This certification is often a prerequisite for supplying to certain markets or industries.
Quality Assurance and Risk Mitigation
Manufacturers may voluntarily seek third-party inspections to bolster their quality assurance processes, reduce the risk of product failures, and enhance their reputation in the market. This external validation of product quality can be a powerful marketing tool and a way to build trust with customers.
Expertise and Resource Constraints
In cases where specialized testing or inspection skills are required that the manufacturer may not have in-house, or when resource constraints prevent comprehensive internal testing, third-party inspectors with the necessary expertise are brought in. This ensures that testing is both thorough and unbiased.
International Trade
For international transactions, third-party inspections can help overcome barriers related to trust and regulatory compliance across borders. They ensure that products meet the destination country’s standards and regulations, facilitating smoother customs clearance and compliance processes.
In essence, third-party inspections serve as an impartial verification of a pipe’s quality, safety, and compliance with relevant standards and specifications, providing confidence to all stakeholders involved in its production, sale, and use.
When an independent third party assists and verifies the inspection of the pipes, a Mill Test Certificate level 3.2 is issued: MTC 3.2 delivers the highest assurance level, with tests and results validated by both the manufacturer and an independent third party, offering the most rigorous validation of compliance and material quality.
TYPES OF PIPES INSPECTIONS
VISUAL INSPECTION
Visual inspection (VI) is a fundamental, non-invasive examination technique used to have a first appraisal of the quality of the newly produced pipes (visual inspection can also be repeated after installation, at regular intervals, to ensure the quality has been maintained).
Visual inspection stands as a highly efficient method for evaluating the overall quality of a pipe about to be delivered (or accepted by a client). This process involves examining the product’s superficial finish and identifying any surface flaws like mechanical scratches, lamination issues, tears, or other visible defects. Additionally, it encompasses the scrutiny of anomalies in the welded areas, if present, including porosity, undercuts, irregular weld beads, and either excessive or insufficient weld material. ASME/API/ASTM have issued recommendations about acceptable visual defects.
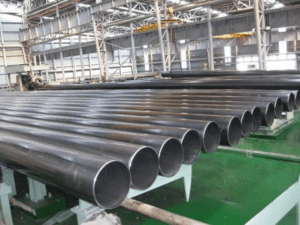
This method is often the first step in a comprehensive inspection regime, offering a quick and cost-effective means to detect potential issues that may require further investigation or immediate remediation.
Key Aspects of Pipe Visual Inspection:
- Surface Conditions: Inspectors look for cracks, dents, and any other surface anomalies that could compromise the pipe’s integrity.
- Weld Quality and Alignment: Welds are closely examined for uniformity, cracks, porosity, and other defects that could affect the strength and leak-tightness of welded joints.
- Coating and Insulation: The condition of protective coatings and insulation materials is assessed to ensure they are as intended
- Markings and Labels: Verifying that pipes are correctly marked with information such as material grade, size, manufacturer details, and pressure ratings, ensuring traceability and compliance with specifications.
- Physical Deformation: Checking for bends, bulges, or any deformations that might indicate mechanical damage or structural weakness.
- Leak Detection: While primarily focusing on visible cues, inspectors may also look for areas that may leak after installation
Techniques and Tools:
While visual inspection is non-invasive and largely reliant on the inspector’s experience and judgment, certain tools may be used to enhance effectiveness, including:
- Flashlights or Portable Lighting: To illuminate dark or shadowed areas for better visibility.
- Mirrors: For inspecting hard-to-see areas, such as the underside of pipes or tight spaces.
- Magnifying Glasses: To closely examine small defects or surface conditions.
- Cameras or Video Equipment: For documenting findings or inspecting internally using borescopes or similar devices, especially in areas not accessible for direct viewing.
Importance and Benefits:
- Early Detection: Identifies potential issues early on, allowing for timely corrective actions before they escalate into more severe problems.
- Cost-Effectiveness: Being one of the most economical inspection methods, it saves resources by pinpointing areas that might require more detailed analysis.
- Simplicity: Does not require complex equipment or extensive preparation, making it adaptable and quick to deploy.
- Preventive Maintenance: Supports preventive maintenance programs by tracking the condition of pipes over time, helping to prioritize repair or replacement activities.
DIMENSIONAL INSPECTION
Pipe dimensional inspection, in the context of ASME (American Society of Mechanical Engineers) and API (American Petroleum Institute) specifications, is a critical quality control process that verifies the geometric dimensions of pipes to ensure they meet the precise standards and tolerances set forth by these governing bodies.
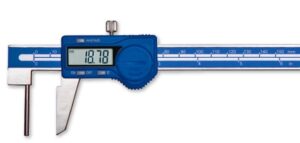
This process is fundamental in industries where pipes are used for critical applications, such as oil and gas, power generation, and chemical processing, to ensure the safety, reliability, and performance of the piping systems.
Key Dimensions Inspected:
- Outside Diameter (OD): Ensures the pipe fits within specified connection and installation equipment.
- Inside Diameter (ID): Important for calculating the pipe’s flow capacity and resistance.
- Wall Thickness: Critical for determining the pressure rating and mechanical strength of the pipe.
- Length: Verification is crucial for logistics, installation, and planning purposes.
- Straightness: Essential for ensuring proper alignment and connection between pipes. Regarding pipe straightness, the ASME/ASTM standards for carbon steel pipes simply mandate that “the completed pipe must exhibit a reasonable degree of straightness” (which seems to indicate that a visual inspection is sufficient). However, according to ASTM A312M (as specified in ASTM A999M), a welded stainless steel pipe needs to maintain straightness within a tolerance of 3.2 mm over lengths of 3.0 meters. As a general guideline, a deviation of 1 mm per meter is deemed acceptable.
- Roundness or Ovality: Ensures the pipe maintains a circular cross-section, which is important for connection integrity and flow characteristics.
It’s not unusual for pipe classes tailored to the needs of specific end-users and buyers to have special agreements regarding dimensional tolerances, which can override the standard tolerances outlined by ASME/API/ASTM norms when accepted by the manufacturer/pipe mill.
Inspection Techniques:
- Calipers and Micrometers: Used for precise measurement of OD, ID, and wall thickness.
- Ultrasonic Testing (UT): Non-destructive technique to measure wall thickness and detect internal imperfections.
- Laser Scanning and Optical Methods: For accurate measurements of dimensions, roundness, and straightness.
- Tape Measures and Rulers: For length and quick reference checks.
ASME and API Specifications:
Both ASME and API provide detailed standards and specifications for pipe manufacturing, including dimensional tolerances. For example:
- ASME B36.10M: Covers dimensions and weights for seamless and welded wrought steel pipes.
- ASME B36.19M: Pertains to stainless steel pipe dimensions and weights.
- API 5L: Specifies requirements for the manufacture of two levels (PSL1 and PSL2) of seamless and welded steel pipes for use in pipeline transportation systems in the petroleum and natural gas industries.
All such Specifications dictate also the allowed outside diameter, wall thickness, length, and weight tolerances: such values are at the basis of a positive or negative outcome of the dimensional inspection.
Importance of Dimensional Inspection:
- Safety and Performance: Ensuring pipes meet specified dimensions is vital for the safety and efficiency of piping systems, especially under high pressure and temperature conditions.
- Compatibility and Interchangeability: Accurate dimensions ensure compatibility with fittings, valves, and other components, facilitating easy installation and maintenance.
- Regulatory Compliance: Adhering to ASME and API standards is often a legal requirement for projects in the energy sector and other industries, ensuring that pipes can withstand operational demands.
- Cost Efficiency: Proper dimension verification can prevent costly project delays and rework by ensuring that all components fit together as intended.
Dimensional inspection is a non-negotiable aspect of quality control in the manufacture and procurement of pipes, serving as a guarantee that the pipes will function as designed in their specific application environments.
MICRO-METALLURGICAL INSPECTION
Pipe metallurgical inspection refers to a comprehensive set of analytical techniques and processes aimed at understanding and evaluating the material properties and microstructural characteristics of pipes.

This form of inspection is pivotal in ensuring that the pipes meet the stringent material specifications and standards required for their intended industrial applications, such as in the oil and gas, chemical, power generation, and construction sectors. Metallurgical inspection helps in identifying material defects, ensuring compliance with design and safety standards, and preventing failures that could lead to operational downtime, safety hazards, or significant financial losses.
Types of Metallurgical Inspection
Material Composition Analysis
Determines the chemical composition of the pipe material to ensure it matches the specified grade and composition standards. Techniques such as optical emission spectrometry (OES) and X-ray fluorescence (XRF) are commonly used for this purpose. This type of analysis is essential for high-grade materials, from stainless steel to higher qualities like nickel alloys.
The analysis of the actual chemical composition may be vital also for carbon steel pipes produced according to specific requirements set by end users (for example max. carbon content).
Ferrite Content (Stainless Steel)
Ferrite content in stainless steel refers to the amount of ferrite phase (a body-centered cubic iron alloy) present in the austenitic (face-centered cubic) matrix. Ferrite content is important in duplex and some austenitic stainless steels because it influences properties such as strength, ductility, weldability, and corrosion resistance. The balance between ferrite and austenite phases is critical; too much ferrite can reduce toughness and enhance magnetic properties, while too little can affect weldability. Ferrite content is often measured using a ferritoscope or through metallographic analysis.
HIC – Hydrogen-induced Cracking
Hydrogen-induced Cracking (HIC) is a form of material failure caused by the diffusion of hydrogen into steel, leading to internal cracking. HIC is a concern in environments where the steel is exposed to hydrogen sulfide (H₂S) and other acidic gases, such as in the oil and gas industry. The absorbed hydrogen makes the steel brittle and susceptible to cracking under stress. Materials for use in H₂S-containing environments are tested for their resistance to HIC to ensure long-term integrity and safety.
SSC – Sulfide Stress Corrosion Cracking
Sulfide Stress Corrosion Cracking (SSC) is a specific type of environmentally assisted cracking that occurs in metals exposed to hydrogen sulfide (H₂S) environments, especially under the influence of tensile stress. Unlike HIC, which is driven by diffused hydrogen, SSC involves the combined action of stress and corrosion due to the presence of H₂S, leading to catastrophic failures even at low-stress levels. SSC is a critical concern in the oil and gas industry, where materials are often in contact with sour gas. Materials intended for such environments must be tested for SSC resistance to ensure durability and operational safety.
Grain Size (Austenitic Stainless Steel & Carbon Steel) or Microstructural Examination
Grain size refers to the size of the individual crystals (grains) within the metal. In both austenitic stainless steel (SS) and carbon or alloy steel (CS/AS), the grain size can significantly influence the material’s mechanical properties and resistance to corrosion. Smaller grains can improve strength (via the Hall-Petch relationship) and toughness, while larger grains might enhance creep resistance. The grain size is controlled during the manufacturing process, especially during heat treatment. In austenitic stainless steels, the grain size is also crucial for maintaining good corrosion resistance.
Mechanical Property Testing
Evaluates the mechanical characteristics of the pipe, such as tensile strength, hardness, impact resistance (Charpy test), and elongation. These properties are crucial for determining the pipe’s ability to withstand operational stresses, pressures, and temperatures.
IGC – Intergranular Corrosion Test (Stainless Steel)
The intergranular Corrosion (IGC) Test is specifically designed for stainless steel to evaluate its resistance to corrosion along the grain boundaries. This form of corrosion is particularly insidious because it can lead to material failure while the bulk of the material remains largely unaffected. The test, often performed as per ASTM A262, is crucial for materials used in corrosive environments, ensuring that the stainless steel’s heat treatment and composition are optimized to resist intergranular attack.
Non-Destructive Testing (NDT) Integration
While not exclusively metallurgical in nature, NDT methods like ultrasonic testing, radiography, and magnetic particle inspection can complement metallurgical inspection by revealing internal and surface defects without damaging the pipe.
MACRO-METALLURGICAL INSPECTION
Macro metallurgical analysis of pipes involves examining the structural features of a pipe’s material at a scale visible to the naked eye or under low magnification.
This form of analysis focuses on assessing the overall quality and uniformity of the material, identifying any macroscopic defects, and verifying the effectiveness of the manufacturing processes, such as welding, forging, and heat treatment.
Macro examination is a crucial step in ensuring the structural integrity and reliability of pipes used in various industrial applications, from oil and gas pipelines to construction and power generation.
Key Aspects and Objectives of Macro Metallurgical Analysis
- Weld Examination: Evaluate the quality of weld seams, looking for discontinuities, misalignments, incomplete penetration, or other weld defects that could compromise the pipe’s integrity.
- Heat Treatment Evaluation: Assesses the effectiveness of heat treatments (such as annealing, normalizing, or quenching and tempering) by examining the changes in grain structure across treated areas. This can reveal if the heat treatment was uniform and achieved the desired material properties.
- Grain Structure Analysis: Identifies the grain size and distribution, which can provide insights into the material’s mechanical properties, such as strength and toughness. Large or uneven grain structures may indicate improper processing or potential weaknesses.
- Detection of Defects: Searches for macroscopic defects like cracks, porosity, slag inclusions, or laminations that could affect the pipe’s performance. Such defects are often precursors to more severe problems like corrosion or stress corrosion cracking.
- Corrosion Assessment: For pipes retrieved from service, macro analysis can reveal areas of external or internal corrosion, helping to evaluate the material’s resistance to corrosive environments.
Techniques Used in Macro Metallurgical Analysis
- Visual Inspection: The initial step involves a thorough visual check for surface defects, deformities, and inconsistencies.
- Low Magnification Microscopy: Uses stereomicroscopes or similar tools to examine the material at magnifications typically under 100x, allowing for a detailed view of the surface and near-surface features.
- Etching: Applying chemical etchants to the pipe’s surface to reveal the macrostructure, including weld zones, heat-affected zones (HAZ), and base material. Etching helps in highlighting grain boundaries, phases, and defects.
- Photographic Documentation: Capturing high-quality images of the macroscopic features for detailed analysis, reporting, and archiving. This aids in tracking material performance over time and in comparing material batches.
Importance of Macro Metallurgical Analysis
Macro metallurgical analysis provides essential information about the quality and condition of pipes before they are put into service or after they have been in use. It helps in preemptively identifying material or manufacturing issues that could lead to failure, ensuring compliance with standards, and supporting continuous improvement in manufacturing processes. This analysis is a critical component of quality control and assurance programs in industries where material failure can have significant safety, environmental, and economic impacts.
DESTRUCTIVE TESTING
Pipe destructive testing refers to a range of tests conducted on pipes or pipe materials that permanently alter or damage them to assess their mechanical properties, structural integrity, and performance limits.

Unlike non-destructive testing (NDT), which leaves the material intact and suitable for use, destructive testing is used to determine the material’s behavior under conditions such as extreme stress, pressure, or temperature until failure occurs. This type of testing provides vital information on a pipe’s quality, durability, and compliance with standards, crucial for applications where failure can result in significant safety hazards or operational disruptions.
Types of Pipe Destructive Testing:
- Tensile Testing: Measures the material’s resistance to being pulled apart and determines tensile strength, yield strength, elongation, and reduction of area. This test is fundamental in understanding how a pipe would perform under axial loads.
- Hardness Testing: Evaluate the resistance of the pipe material to indentation and abrasion. Common methods include Rockwell, Brinell, and Vickers hardness tests. Hardness testing gives an indication of material strength and wear resistance.
- Impact Testing: Determines the material’s toughness—the ability to absorb energy and plastically deform without fracturing. Charpy and Izod are common impact tests, providing critical information on how a pipe would behave in low-temperature environments or under sudden impacts.
- Bend Testing: Assesses the material’s ductility and the quality of weld joints. In this test, a pipe sample is bent to a specific angle or until failure, revealing any brittleness or defects in the material or weld.
- Flattening Testing: Involves compressing a pipe section until it flattens at a predetermined rate. The test is used to check the material’s ductility and soundness, identifying any cracks or defects as the material deforms.
- Burst Testing: Tests the pipe’s ability to withstand internal pressure by pressurizing it until it bursts. This test provides data on the pipe’s ultimate pressure resistance and the failure mode.
- Chemical Analysis: While not a mechanical test, chemical analysis destructively assesses the material composition to ensure it meets specified alloying requirements. Techniques can include optical emission spectrometry (OES) or X-ray fluorescence (XRF).
NON-DESTRUCTIVE TESTING (NDT)
Non-destructive testing (NDT) for pipes is a collection of analysis techniques used to evaluate the properties of a material, component, or system without causing damage. Learn more about the optional types of NDT that can executed on pipes, pressure vessels, and other piping materials.
PIPES HYDROSTATIC TEST
The hydrostatic test is a crucial procedure in the pipeline industry, serving as a fundamental aspect of ensuring the safety and integrity of pipe systems. This test involves filling a pipe or a section of a pipeline with water or another incompressible fluid and then pressurizing it to a specified level higher than its operational pressure to check for leaks, weaknesses, or defects in the material or construction.
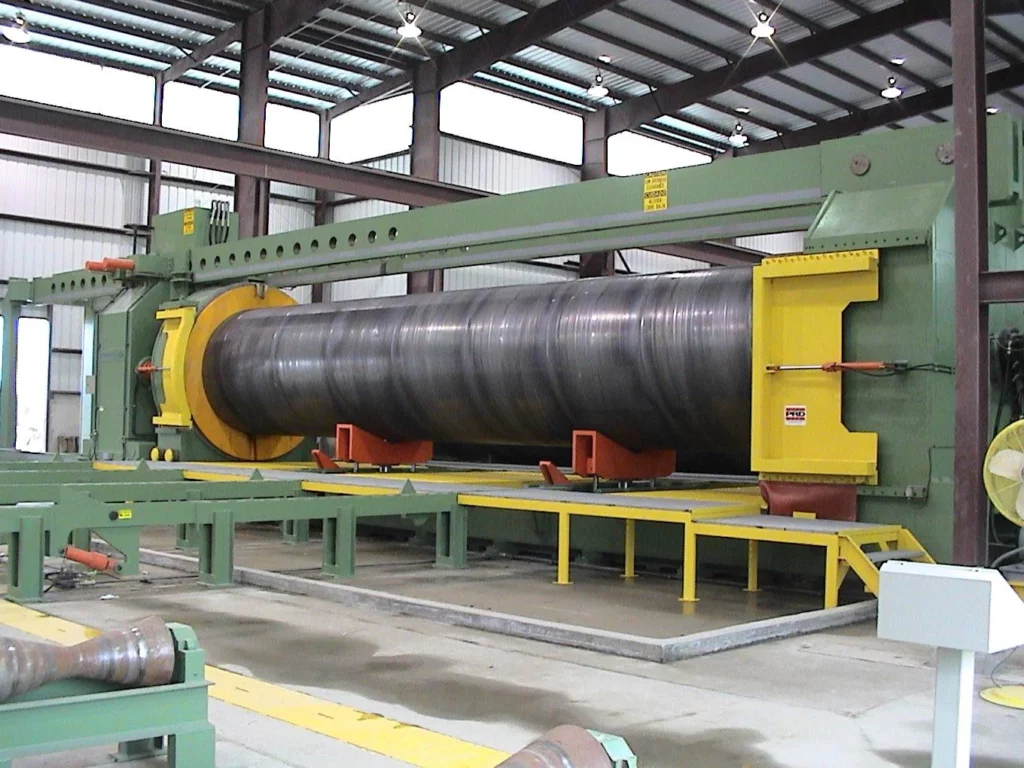
The hydrostatic test is a form of non-destructive testing (NDT) that verifies the strength and leak resistance of pipes under pressure conditions more severe than they will typically encounter in service.
The topic of hydrostatic testing has been thoroughly analyzed in this dedicated article, to which we refer the reader.
MARKING INSPECTIONS
Inspection of pipe marking is a critical quality control process that involves verifying the information stamped or labeled on the surface of pipes. This step ensures that the pipes meet specified standards and requirements, providing essential information about the pipe’s manufacture, material properties, and compliance with regulatory standards.
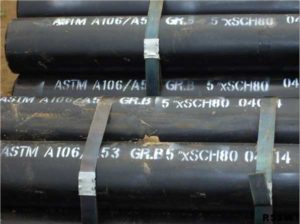
Pipe markings typically include the manufacturer’s name or trademark, material grade, size dimensions, pressure ratings, and relevant standard specifications (e.g., ASTM, ASME, API).
Purpose of Pipe Marking Inspection:
- Material Identification: Confirms the material grade and type, essential for ensuring the pipe is suitable for its intended application, especially in systems that handle corrosive substances or operate under high pressure and temperature conditions.
- Traceability: Enables the tracing of the pipe back to its manufacturing batch, facilitating quality control, and allowing for the identification of the pipe in case of recalls or quality issues.
- Compliance Verification: Ensures that the pipe meets the specific standards and regulations required for the project, helping to avoid the use of substandard materials that could compromise safety and operational integrity.
- Specification Matching: Confirms that the physical and chemical properties of the pipe, as indicated by the markings, match the specifications required by the engineering design, including dimensions and pressure ratings.
Pipe Marking Inspection Process:
Visual Inspection: The first step involves visually examining the pipe’s surface to locate and read the markings. This may require cleaning the surface area to ensure visibility.
Verification: The inspector compares the information on the pipe with project specifications, material requisitions, and applicable standards to verify accuracy and compliance.
Documentation: All findings from the marking inspection are documented, including any discrepancies or non-conformances. This documentation is crucial for quality assurance records and project auditing.
Rectification: If discrepancies or errors are found, steps are taken to rectify the issue. This may involve further testing, returning the pipe to the manufacturer, or replacing it with a pipe that meets all specifications.
SPECIAL END USERS REQUIREMENTS
Special end-user specifications for pipes often go beyond standard industry requirements to ensure the materials’ suitability for specific applications, especially in environments that present unique challenges such as extreme temperatures, corrosive substances, or high pressure.
Manufacturers may need to meet these customized specifications to ensure the safety, reliability, and longevity of their products. When such requirements are present in a purchase order for a pipe mill, tailored inspection procedures have to be put in place and executed at delivery.
Some common special specifications for pipes include:
Restriction on Carbon Equivalent (CE)
The carbon equivalent is a measure used to predict the weldability of steel materials. A lower CE indicates better weldability and a reduced likelihood of cracking in the heat-affected zone during welding. Specifications may set a maximum CE value to ensure that the steel can be safely welded without preheating or post-weld heat treatment, important for complex structures or in-field repairs.
Low-Temperature Tensile Testing
This testing assesses the material’s mechanical performance and ductility at low temperatures, crucial for applications in cold environments where materials can become brittle. Pipes intended for use in arctic conditions or for transporting cold liquids and gases must retain their strength and toughness at the temperatures they will encounter.
Transverse Tensile Testing
Transverse tensile testing measures the tensile strength of a material perpendicular to the direction of grain flow. This test is particularly relevant for welded pipes, where the properties of the weld zone can significantly differ from the base material. Ensuring that the welds can withstand tensile forces without failing is crucial for the overall integrity of the pipe.
Impact Testing at Low Temperatures
Ensures that the material can withstand sudden impacts without cracking, essential for structures exposed to mechanical shocks at cold temperatures.
Sulfide Stress Corrosion Cracking (SSC) Resistance
For pipes used in the oil and gas industry, resistance to SSC in sour environments (high H2S content) is critical for preventing failures.
Enhanced Corrosion Resistance
Specifications may require alloying elements (like chromium, molybdenum, or nickel) beyond standard levels to improve resistance to corrosion in harsh environments.
Ultra-Low Sulphur Content
Reducing sulfur content in steel can enhance its toughness and reduce the risk of hot shortness in welding.
Fine Grain Practice
Specifies the need for a fine-grain microstructure to improve the toughness and ductility of the steel, which is often achieved through controlled rolling or thermal treatments.
Meeting these specialized requirements demands rigorous quality control and testing from pipe manufacturers, often necessitating custom manufacturing processes, advanced material formulations, and thorough documentation to prove compliance.
